
No products in the cart.

To create a Windows 10 USB using Rufus (UEFI or Legacy), you can follow these steps:
Note: Before proceeding, make sure you have a Windows 10 ISO file and a USB flash drive with at least 8 GB of storage capacity.
Download Rufus:
Go to the Rufus website (https://rufus.ie/) and download the latest version of Rufus.
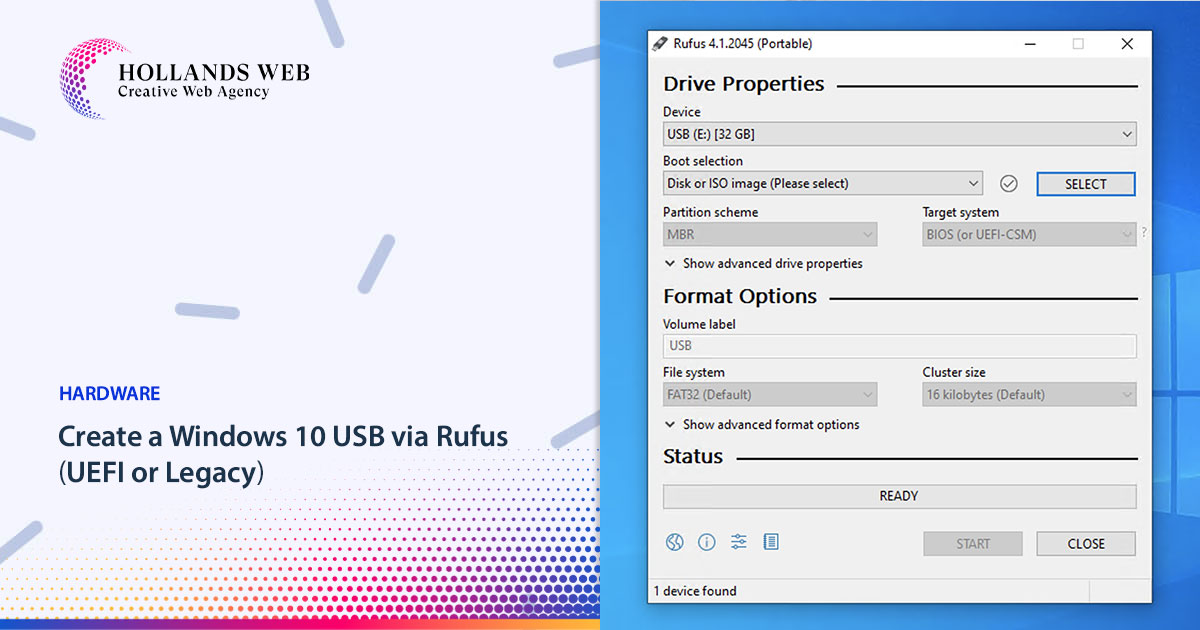
Launch Rufus:
Once downloaded, run the Rufus executable file to launch the application.
Select your USB drive:
In the “Device” dropdown menu, select the USB flash drive you want to use for creating the Windows 10 USB.
Choose the partition scheme and target system type:
- For UEFI: Under “Partition scheme,” select “GPT” and under “Target system,” select “UEFI (non-CSM).”
- For Legacy/BIOS: Under “Partition scheme,” select “MBR” and under “Target system,” select “BIOS or UEFI”.
- If “BIOS or UEFI” doesn’t show in the list Just press Alt + E and then will show this option.
Note: The selection of UEFI or Legacy depends on the type of system you plan to install Windows 10 on. If your computer supports UEFI, it’s recommended to choose the UEFI option.
Select the Windows 10 ISO:
Click on the small disk icon next to the “Boot selection” section and browse to the location where you have the Windows 10 ISO file. Select the ISO file and click “Open.”
Configure Rufus settings:
- File system: Select “NTFS” (recommended) or “FAT32” as the file system for the USB drive.
- Volume label: You can provide a custom name for the USB drive if you want.
- Check the “Quick format” and “Create extended label and icon files” options.
- Leave all other settings as default unless you have specific requirements.
Start the Windows 10 USB creation process:
Double-check all the settings and make sure you have selected the correct USB drive and Windows 10 ISO file. Once you are ready, click the “Start” button to begin the process.
- Rufus will display a warning message that all data on the USB will be destroyed. Ensure you have backed up any important data from the USB drive, as this process will format it.
- Click “OK” to proceed, and Rufus will start creating the Windows 10 USB. It may take several minutes to complete the process, depending on your system’s speed and the size of the ISO file.
- Once Rufus completes the process, it will display a “READY” status. You can now close Rufus and safely remove the USB flash drive.
Congratulations! You have successfully created a Windows 10 USB using Rufus. You can now use this USB to install or repair Windows 10 on your computer. Convert an MBR Disk to GPT Disk Through Installation Windows
You may also like

Table of Contents Toggle WebChatGPT:Perplexity AI:ChatGPT for Google:Fireflies AI:Monica AI Copilot:ChatGPT File Uploade...

Table of Contents Toggle But wait, what is an SSL Certificate?OK, so why do I need to get an SSL Certificate?How do I kn...

Table of Contents Toggle What Are The Benefits Of Local SEO?Can My Business Benefit From Local SEO Marketing?It’s Time T...

Table of Contents Toggle Overview about MetatagsWhy use Metatags?Basic HTML Meta TagsOpenGraph Meta TagsCreate Custom Me...
 Web Hosting
 Web Designs
 Graphic Design
 SEO
SEO Digital Marketing