
No products in the cart.


Google Analytics is a web analytics service that offers data and fundamental analytical capabilities for marketing and search engine optimization (SEO) needs. Anyone with a Google account can use the service for free and it is a part of the Google Marketing Platform.
To monitor website performance and gather visitor data, Google Analytics is employed. Organizations can use it to identify the main user traffic sources, evaluate the effectiveness of their marketing initiatives and campaigns, track goal accomplishments (like purchases and cart additions), identify patterns and trends in user engagement, and gather other visitor data like demographics. Google Metrics is frequently used by small and medium-sized retail websites to gather and analyze different customer behavior analytics, which can be utilized to enhance marketing campaigns, increase website traffic, and better retain customers.
Create Google Analytics in just 5 steps:
- Set up Google Tag Manager
- Create a Google Analytics account
- Set up analytics tag with Google Tag Manager
- Set up goals
- Link to Google Search Console
Set up Google Tag Manager
Google offers a tag management tool called Google Tag Manager for free.
The process is straightforward: Google Tag Manager delivers all the data from your website to other services like Google Analytics and Audience Insights.
It also makes it simple for you to update and add tags to your Google Analytics code, saving you time and a ton of effort in the future without requiring you to manually create code on the back end.
It also makes updating and adding tags to your Google Analytics code straightforward without requiring you to manually create code on the back end, saving you time and a ton of aggravation in the long run.
To start, you must register for a Google Tag Manager account.
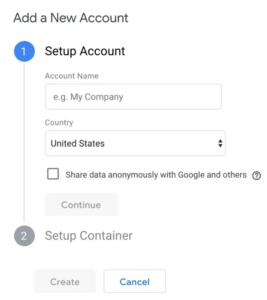
Type in an account name and press the next button.
The next step is to create a container, which Google describes as “a bucket housing all of the macros, rules, and tags” for your website.
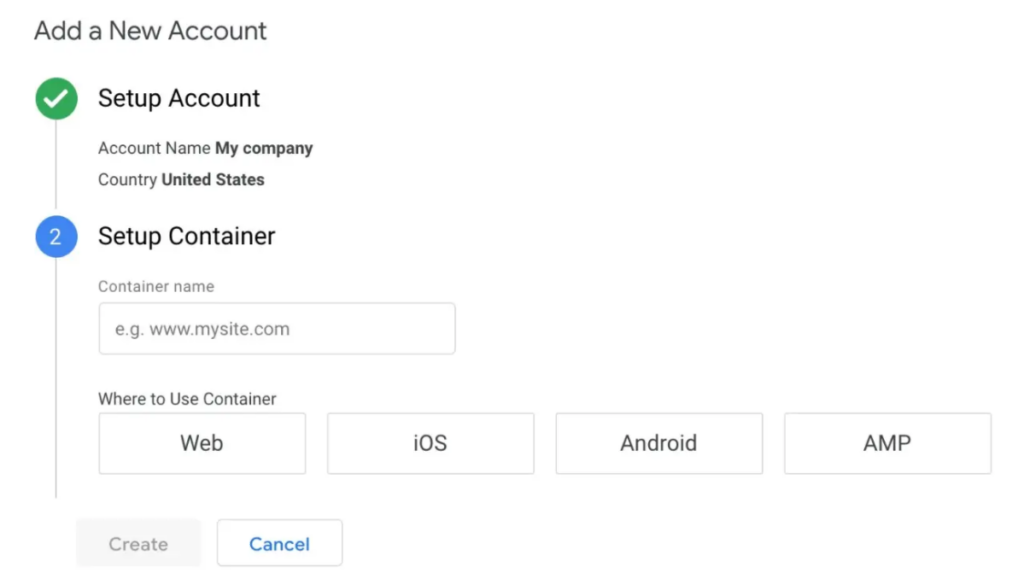
Give your container a meaningful name, then decide what kind of content it will be linked to (Web, iOS, Android, or AMP).
Once you’ve finished, click Create, read the Terms of Service, and confirm your agreement with them. The installation code snippet for the container will then be sent to you.

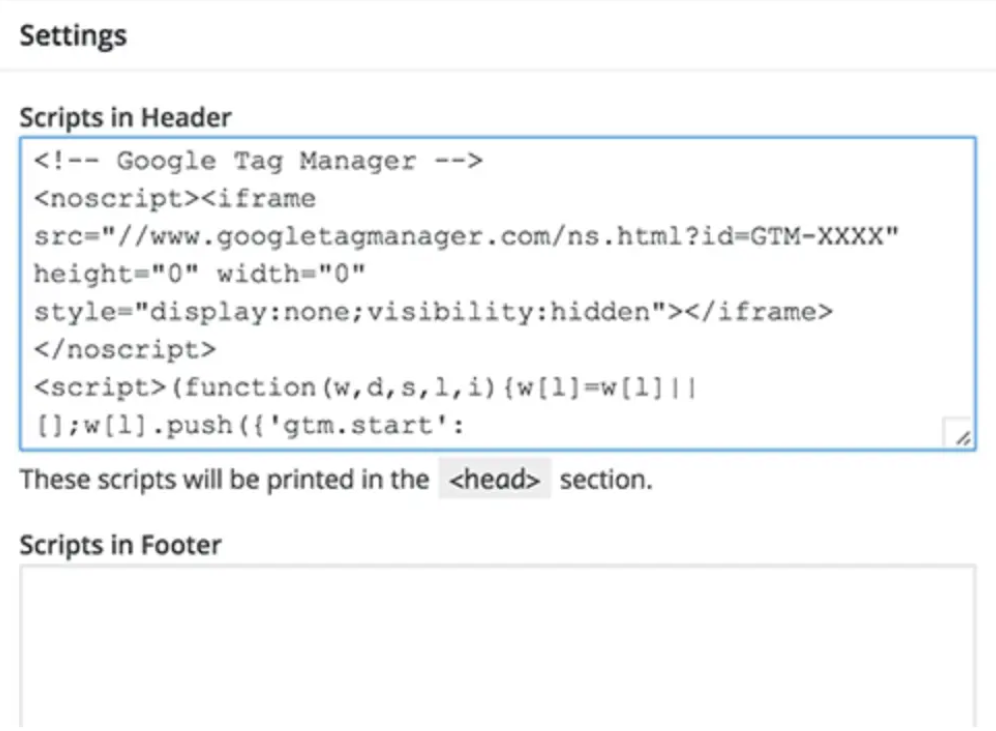
You will be pasting this code into the back end of your website in order to manage your tags. Copy and paste the two pieces of code onto each page of your website to accomplish this. You must place the first one in the header and the second one after the body’s opening, as instructed.
if you using WordPress, this is simple to accomplish by inserting the two bits of code into your theme.
Pro tip: The Insert Headers and Footers plugin for WordPress might help to make this process even simpler (or equivalent for other types of websites). You will only need to copy and paste the script once, making it possible to add any script to the header and footer of your entire website.
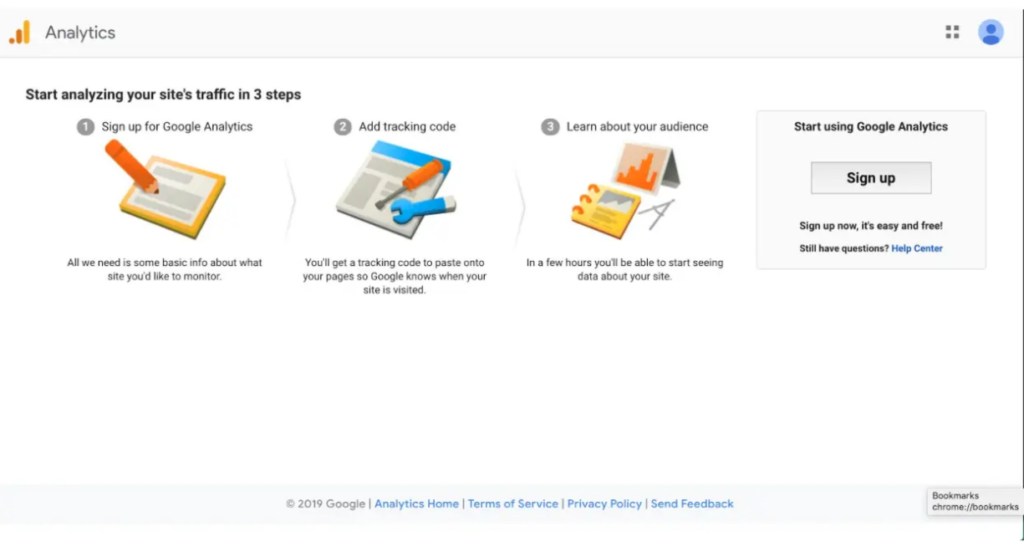
Set up Google Analytics
Similar to Google Tag Manager, you’ll have to register for a Google Analytics account on the Google Analytics page.
Input the URL, account name, and name of the website. Make sure to choose the industry category for your website as well as the time zone that you want the reporting to take place in.
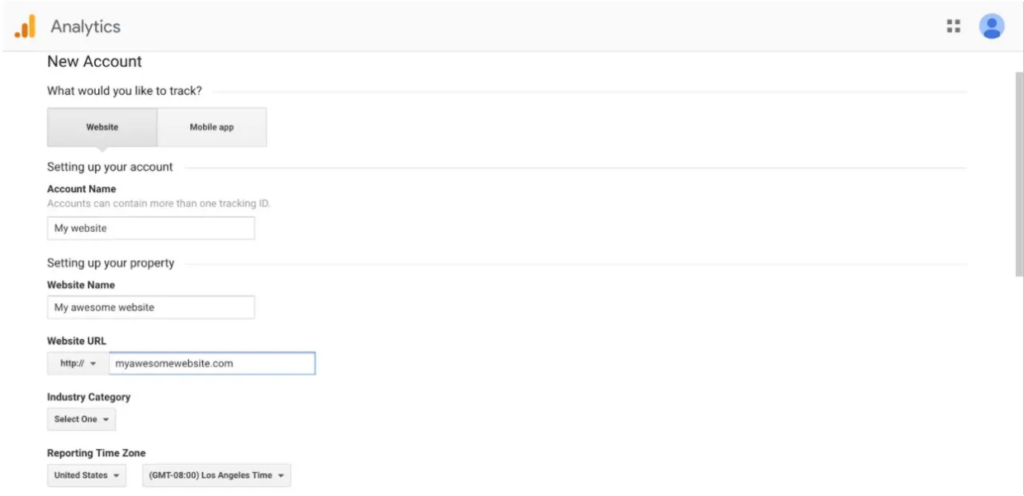
Accept the Terms and Services after completing those steps to receive your tracking ID.
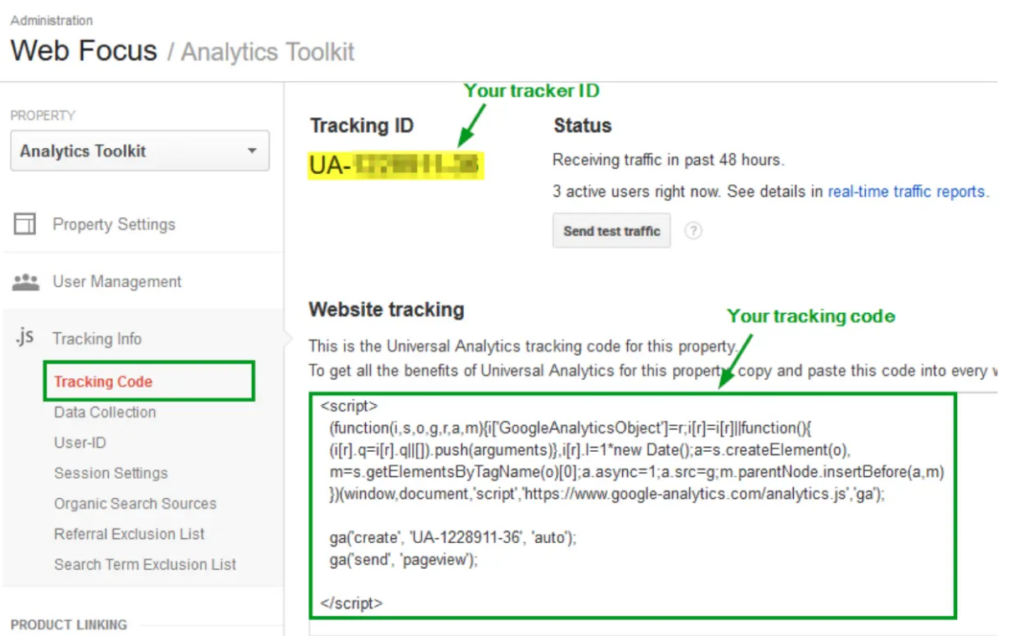
A series of integers known as the tracking ID instructs Google Analytics to deliver you analytics data. The number appears to be UA-000000-1. Your personal account number is represented by the first set of numbers (000000), and the property number is represented by the second set of numbers.
Avoid publicly disclosing the tracking ID because it is exclusive to your website and your personal information.
Set up analytics tag with Google Tag manager
You will now discover how to configure particular Google Analytics monitoring codes for your website.
Click the Add a new tag button on your Google Tag Manager dashboard.
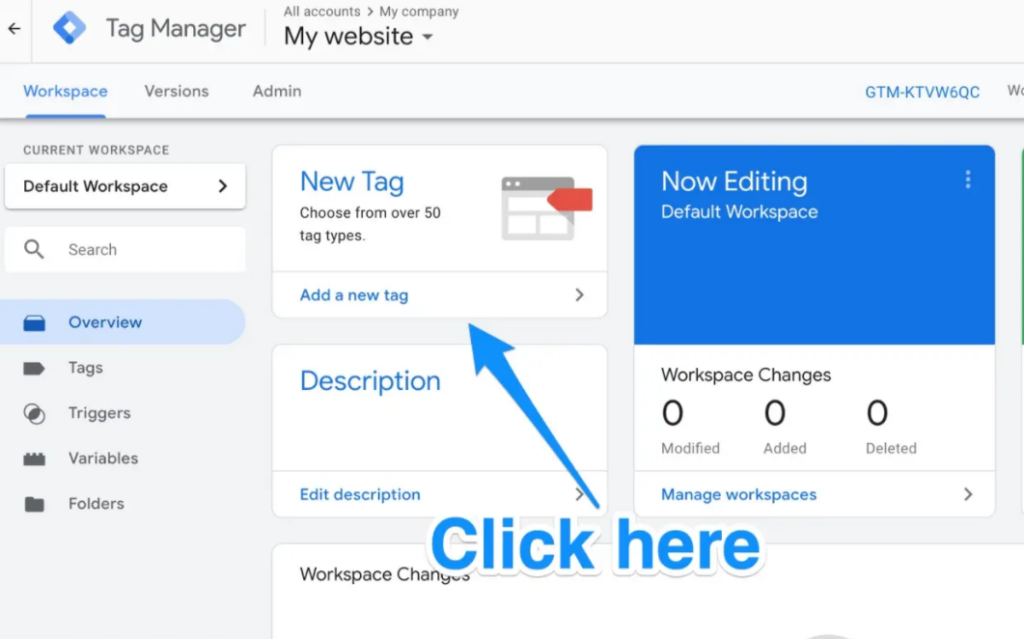
Your new website tag can be created on the page that will be directed to you.
You can alter two components of your tag in these areas:
Configuration. where the tag will send the data it collects.
Triggering. What kind of information do you wish to gather?
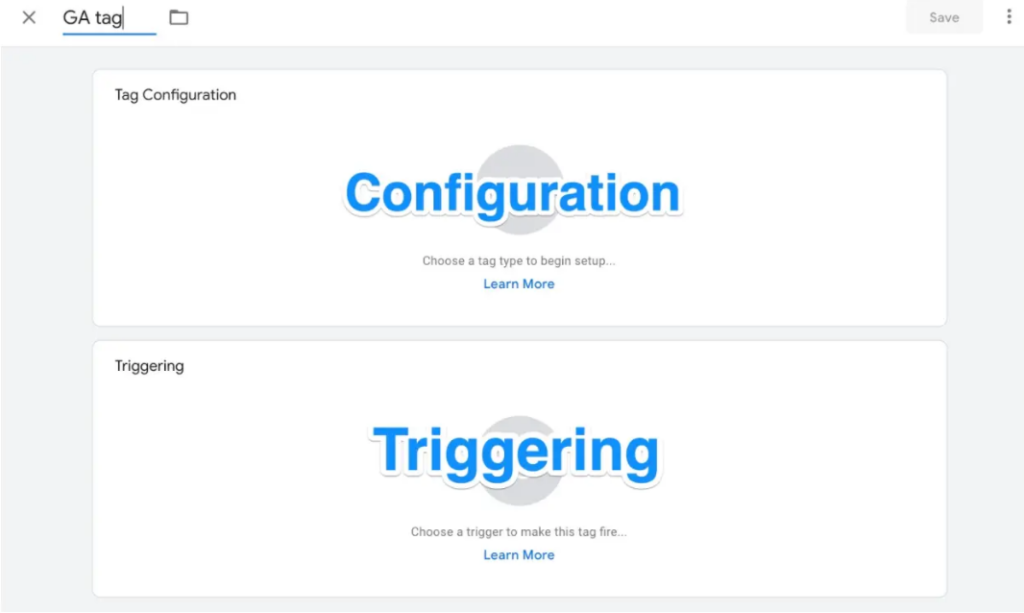
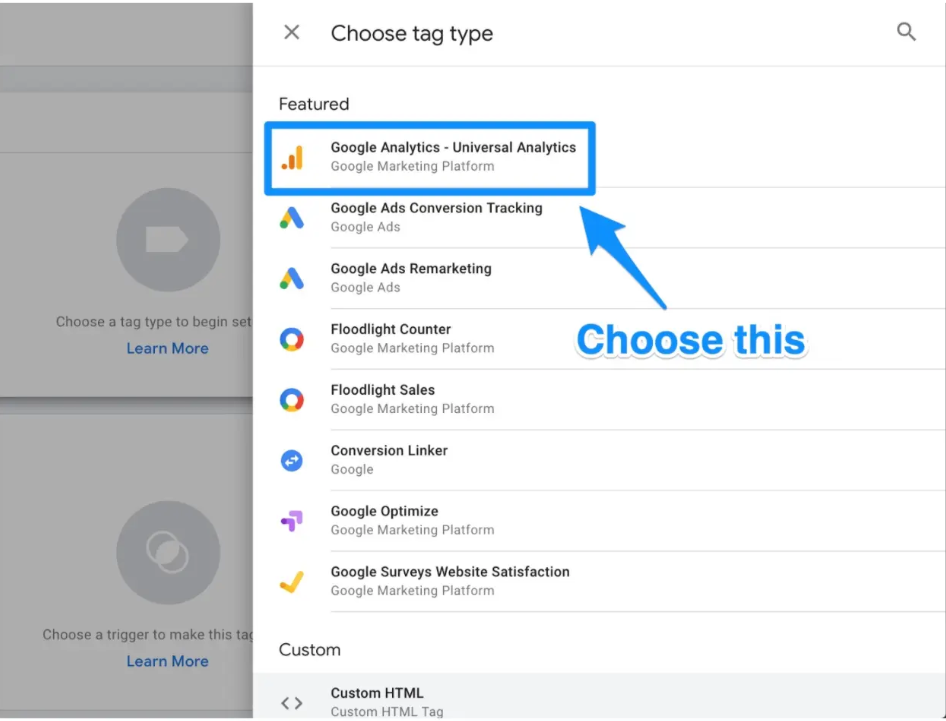
To select the kind of tag you wish to create, click on the Tag Configuration option.
To create a tag for Google Analytics, you need to select the “Universal Analytics” option.
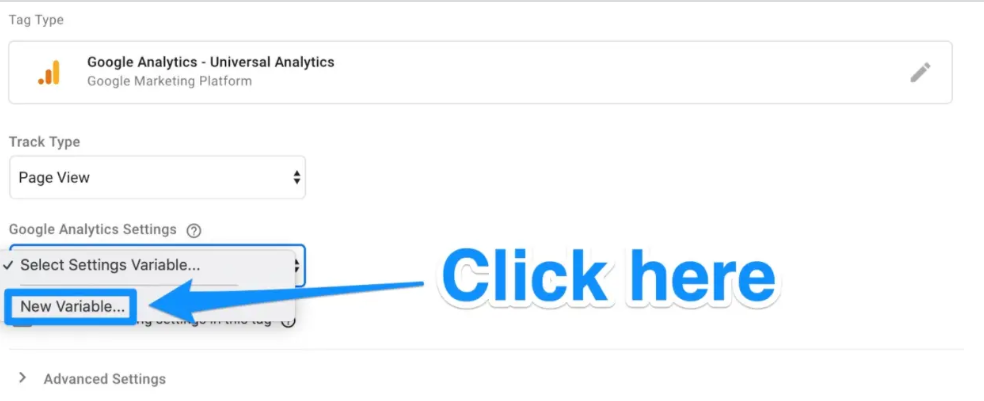
You can then select the kind of data you wish to track after clicking that. Following that, select “New Variable…” from the dropdown menu under “Google Analytics Setting” in the following step.
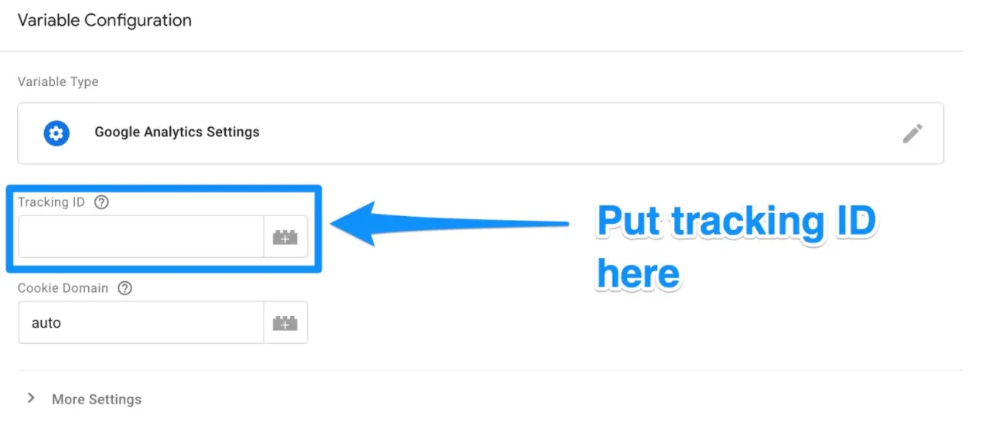
After that, you’ll be directed to a new window where you can input your Google Analytics tracking ID. This will send data from your website directly to Google Analytics, where you can view it afterwards.
When you’re finished, go to the “Triggering” area and choose the information you want to send to Google Analytics.
The “Choose a trigger” page will be displayed once you click the Triggering button, just like you did with the “Configuration” button. To send data from all of your web pages, click All pages from here.

After everything is done, your new tag setup ought to be like this:
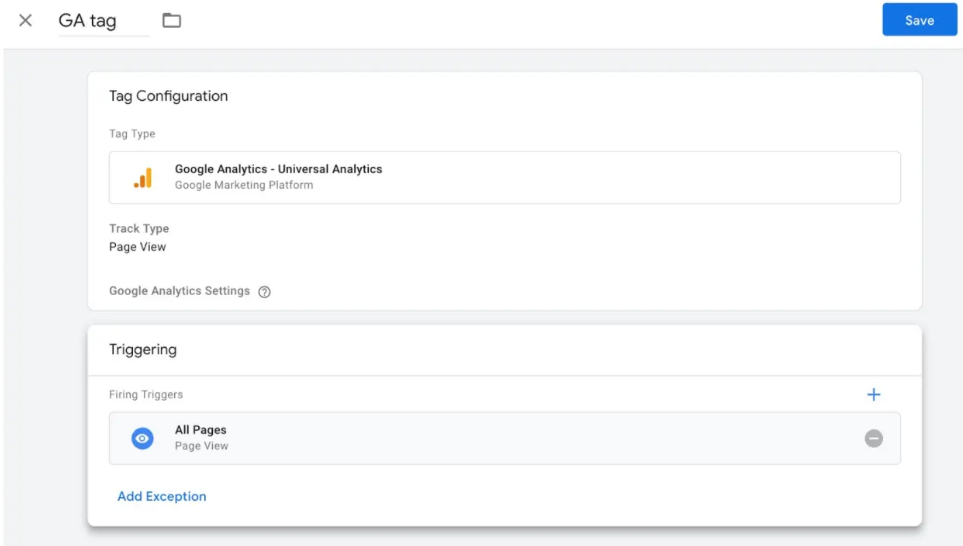
Now just click Save, and there you have it! You now have a new Google Tag that is monitoring and reporting information about your website to Google Analytics!
Set up Google Analytics goals
Google Analytics doesn’t know the key performance indicators for your website and company, whereas you definitely do.
You must therefore describe to Google what success means for your website.
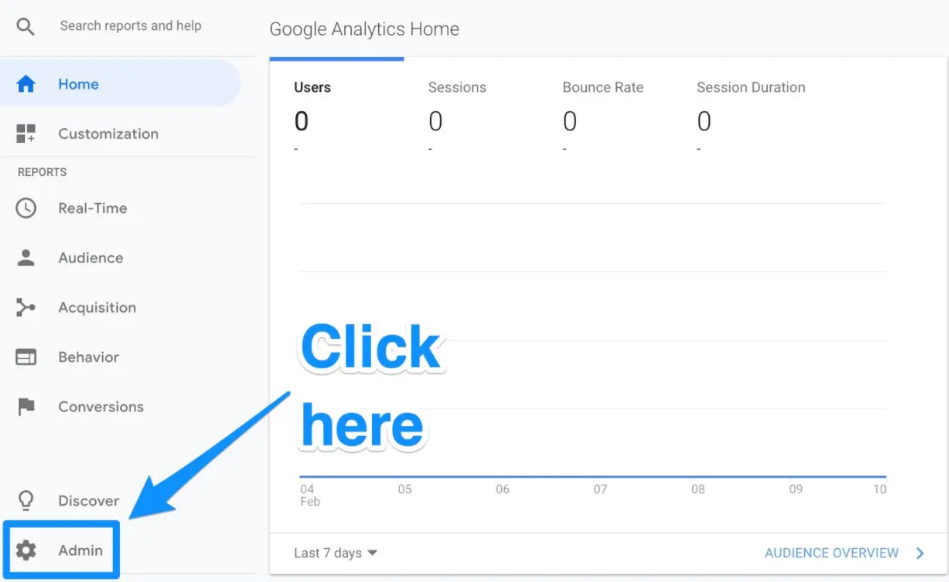
You must define goals on your Google Analytics dashboard in order to accomplish that.
In the lower-left corner, click the Admin icon to get started.
When you do, a different window will open and you’ll find the “Goals” button there.
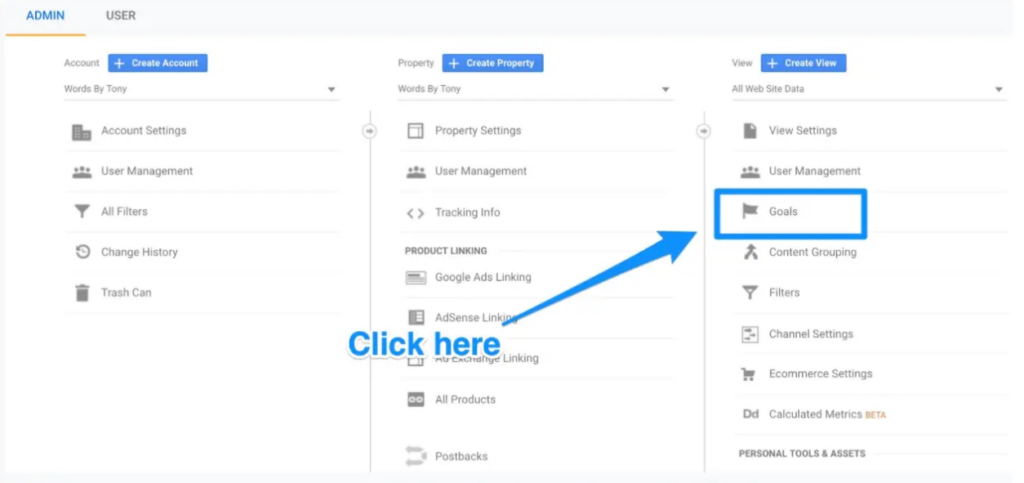
You can add a new goal by clicking that button, which will then lead you to the “Goals” dashboard.

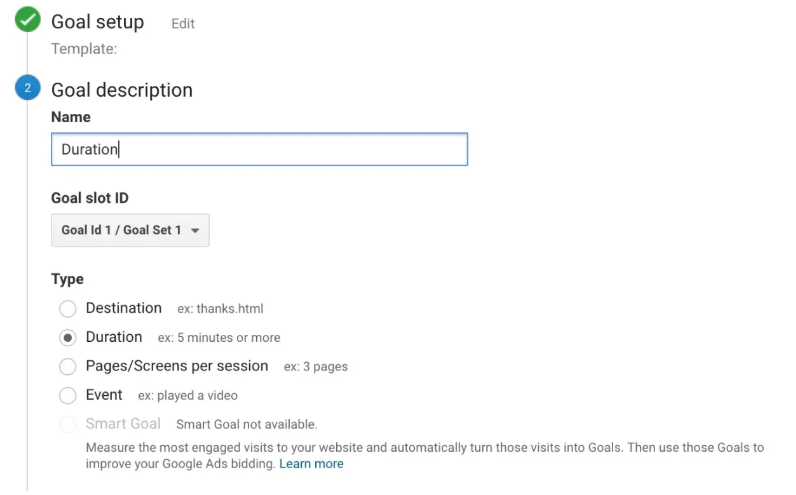
From here, you can browse through many goal templates to see whether one corresponds with your intended goal. Additionally, you must decide on the kind of objective you desire. They consist of:
- Destination: e.g., if you wanted the user to land on a particular web page.
- Duration: e.g., if you wanted visitors to stay on your site for a particular period of time.
- Pages/Screens per session: e.g., if you wanted users to visit a certain number of pages.
- Event: e.g., if you wanted viewers to click a link or play a video.
From there, you can be even more precise with your objectives by deciding how long customers must stay on your website before you can declare it a success. Save the goal after finishes, and Google Analytics will start tracking it for you.

Link to Google Search Console
Google Search Console is a strong tool that may give webmasters and marketers access to priceless search metrics and data.
It allows you to carry out tasks like:
- Check the crawl rate for your website.
- Check to see when Google examines your website.
- Analyze the internal and external links that lead to your website.
- Examine the keyword searches for which you appear in search engine results.
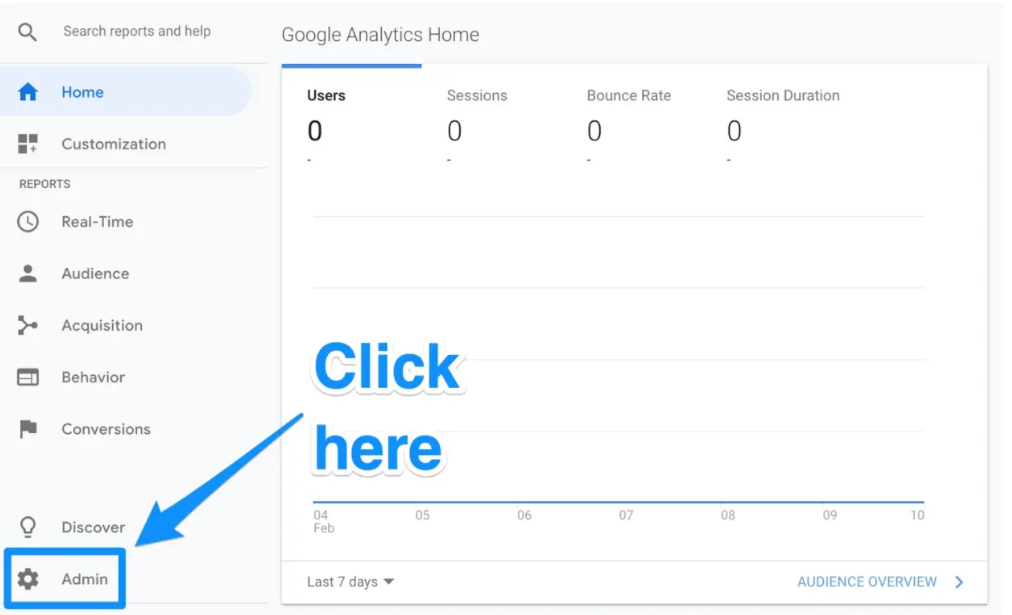
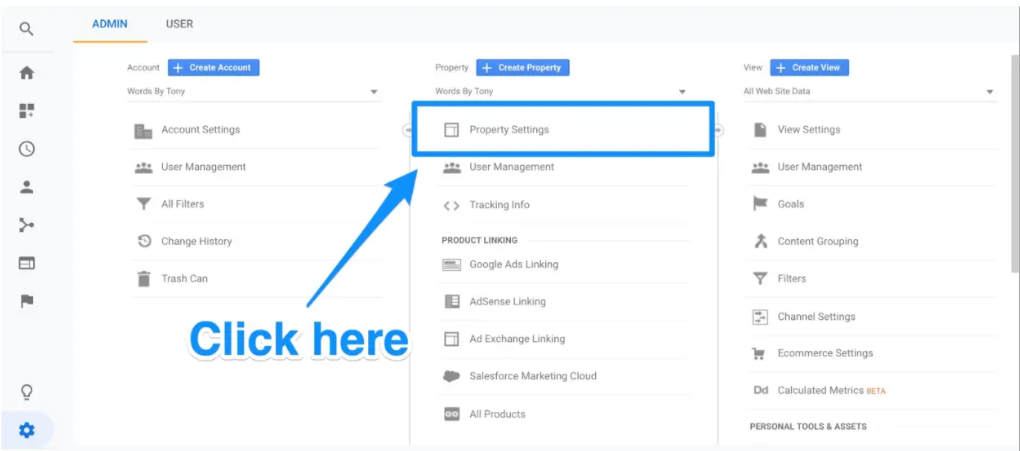
Click the gear icon in the lower-left corner of the main dashboard to configure it.
Following that, select Property Settings from the middle column.
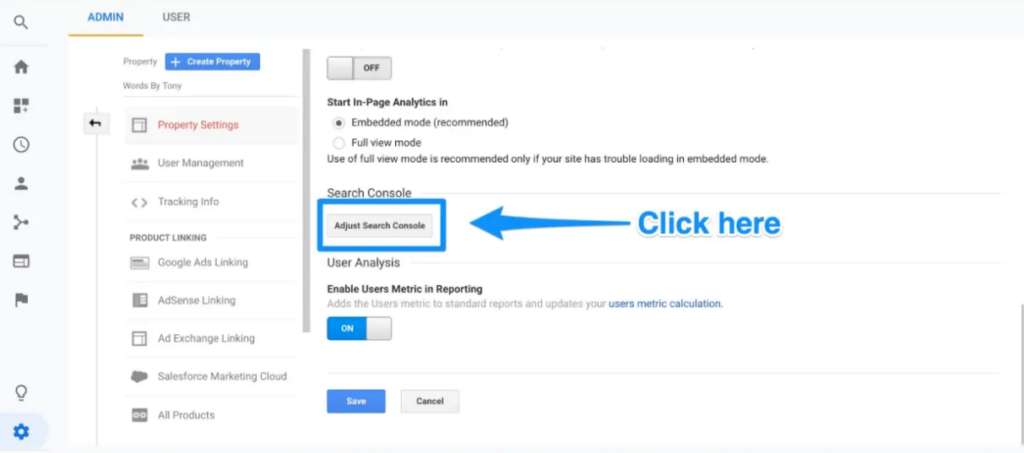
Click on Adjust search console.
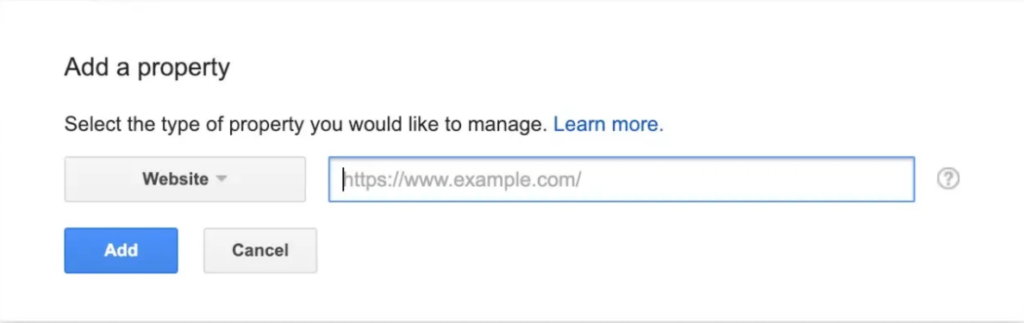
You can begin the process of adding your website to Google Search Console at this point.
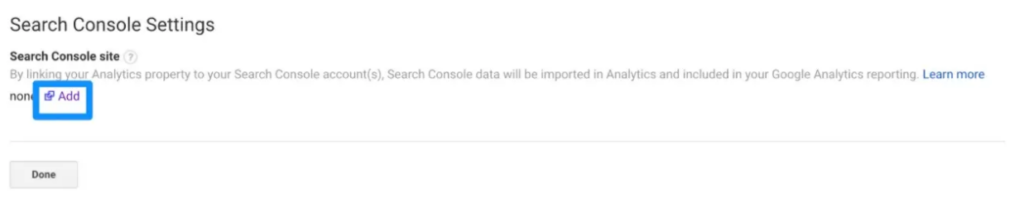
When you click the add button you will be redirected to this page. Click the Add a site to Search Console button at the bottom.
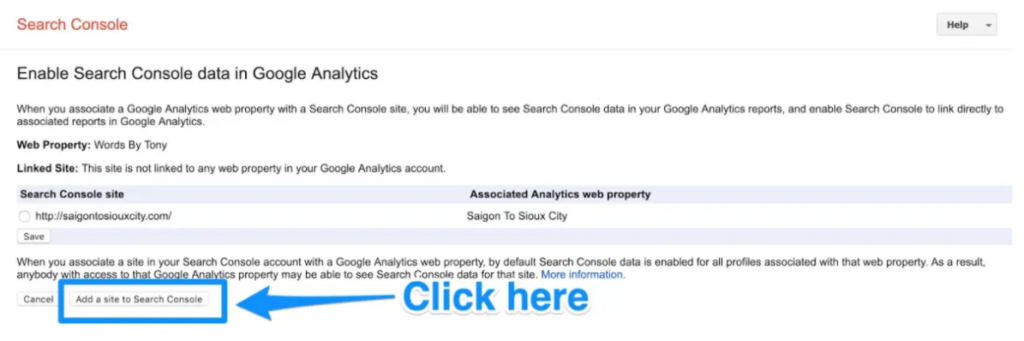
You’ll be taken to this page if you select the Add button. Click the Add a site to Search Console button at the bottom.
To add the HTML code to your website, follow the instructions. When you’re finished, click “Save,” and Google Analytics should send you back there!
To view your Google Search Console data, check back later since it might not display straight away.
Finally, I wish you could follow the instructions as I have tried to write with details to make sure that you can get the whole information.
Manar Hasan
You may also like

Table of Contents Toggle Why use Metatags?Most Important Meta Tags:Title Tag:Meta Description Tag:Meta Robots Tag:Canoni...

Table of Contents Toggle Explaining Server Optimization1. Optimize images:2. Use a Content Delivery Network (CDN):3. Min...

Table of Contents Toggle Identify your target audience:Define your product or service:Conduct market research:Create buy...
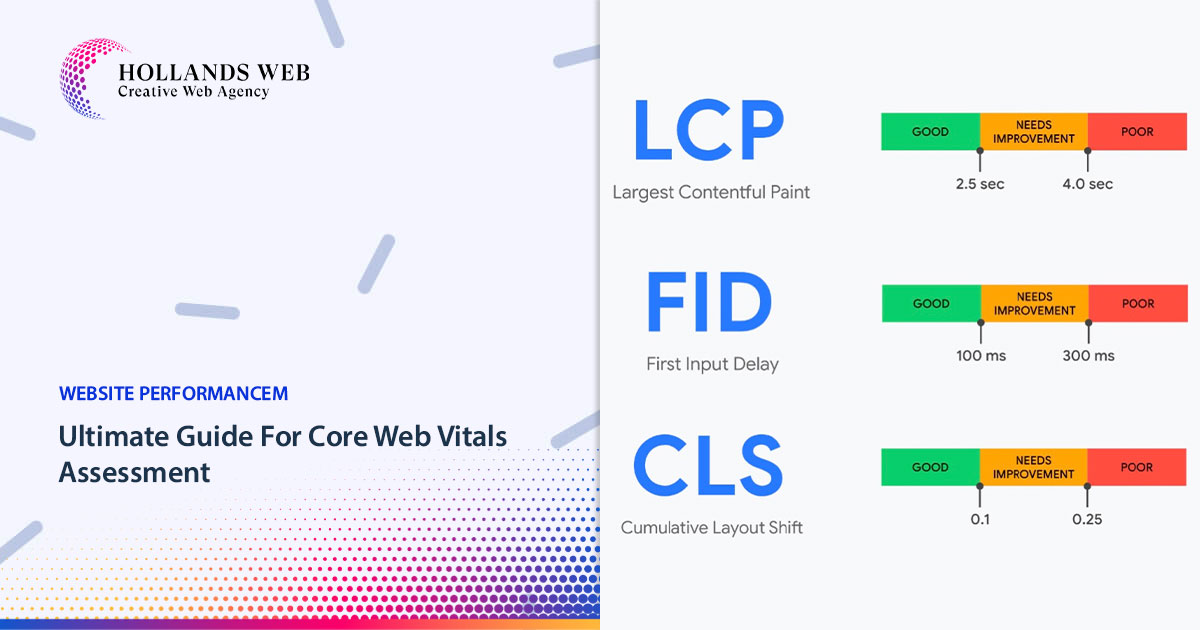
Table of Contents Toggle Understanding Core Web Vitals:Largest Contentful Paint (LCP):First Input Delay (FID):Cumulative...
 Web Hosting
 Web Designs
 Graphic Design
 SEO
SEO Digital Marketing